
The purpose here is to setup a simple MVVM architecture to bind ViewModel’s data to its dedicated View which will be a UITableView contained in a UITableViewController. Furthermore, we are binding a UIBarButtonItem’s tap event to the ViewModel which will handle the datasource populating, informing the view that there is a new item to display. Every bindings will be made available through RxSwift.
This how-to is not a RxSwift tutorial and will not cover the keys and principles of Rx. There is a lot of great resources on the web if you’d like to get started with RxSwift, like the following :
- RxSwift GitHub repository
- RxSwift by example serie
- RxMarbles a really good resource for Rx operators understanding
- Prerequisites
For this how-to, we’ll use a Swift Playground generator which is able to include any ‘pod’ (dependency) to it.
https://github.com/neonichu/ThisCouldBeUsButYouPlaying
You’ll need a computer running macOS to run the Playground.
This tool needs Ruby to run, you can install it through HomeBrew.
To generate a RxSwift, RxCocoa Playground, follow those steps:
- First, install the tool
$ gem install cocoapods-playgrounds
- Then generate an RxSwift and RxCocoa capable Playground
$ pod playgrounds RxSwift,RxCocoa
That’s it, your Playground should be named ‘RxSwiftPlayground’, open that directory then open the ‘RxSwift.xcworkspace’ file and build the ‘RxSwiftPlayground’ scheme. You are now ready to get into this how-to!
Playground setup
Open the ‘RxSwift.playground’ then remove its content. We’ll need some imports to get started. Add these imports to the top of the Playground file.
import RxSwift
import RxCocoa
import UIKit
import PlaygroundSupport
PlaygroundPage.current.needsIndefiniteExecution = true
UITableViewController setup
First, we’ll setup a classic UITableViewController which automatically handles a UITableView bounds to its edges.
class TableViewController: UITableViewController {

	//1
	private let addButton = UIBarButtonItem(barButtonSystemItem: .add, target: self, action: nil)
	private let cellIdentifier = "Cell"

	//2
	override func viewDidLoad() {
		super.viewDidLoad()
		setupAddButton()
		setupTableView()
	}

	//3
	private func setupAddButton() {
		navigationItem.setRightBarButton(addButton, animated: true)
	}

	//4
	private func setupTableView() {
		//This is necessary since the UITableViewController automatically set his tableview delegate and dataSource to self
		tableView.delegate = nil
		tableView.dataSource = nil

		tableView.tableFooterView = UIView() //Prevent empty rows
		tableView.register(UITableViewCell.self, forCellReuseIdentifier: cellIdentifier)
	}
}
- Let’s define some properties, first a
UIBarButtonItemwith.addSystemItem which represents a ‘+’ sign. It will be the trigger button to add items to ourUITableView. Second, is the cell identifier used by ourUITableViewto register and reuseUITableViewCell. - Inside the
UITableViewController‘s viewDidLoad method we are calling two basic setup methods, one to add the addButton to theUITableViewController‘sUINavigationBar, the other to setup theUITableViewController‘s UITableView - The addButton is added to the
UINavigationBarright part - We are setting up the
UITableView, by removingUITableView‘s delegate and dataSource to let RxSwift works by handling it itself, then we are registeringUITableViewCelltype with the previously defined cellIdentifier.
Playground’s live view setup
In order to make the TableViewController visible in the Xcode Assistant Editor, we need to create a TableViewController instance embedded in a UINavigationController, then resize the UINavigationController to a real iPhone dimension.
let rootViewController = TableViewController()
rootViewController.title = "RxSwift TableView Binding"
let navigationController = UINavigationController(rootViewController: rootViewController)
// Let  resize the navigationController to look like a real iPhone size (iPhone SE in this case)
navigationController.view.frame = CGRect(x: 0, y: 0, width: 320, height: 568)
Then just add the newly created UINavigationController.view to the current Playground’s live view.
PlaygroundPage.current.liveView = navigationController.view
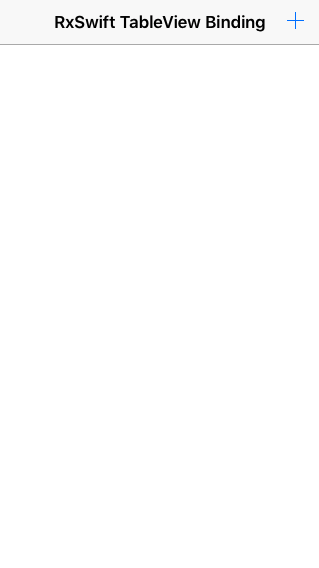
The last step is to make the live preview visible, just click on View > Assistant Editor > Show Assistant Editor in the Xcode top menu. You should see the following render in your Assistant Editor
ViewModel setup
The ViewModel’s purpose here is to provide a dataSource of String items and add an item to it wherever the plus button is tapped. To achieve this, we’ll need to declare a privateDataSource property of type Variable<[String]> in the ViewModel. The Variable type is a simple container that can be observed. Here we declare a container of type: Array of String.
Then we’ll need to declare the exposed dataSource which is an Observable<[String]>, this is the actual dataSource the View will bind to.
We finally need to declare a DisposeBag property. A DisposeBag is a bag within which we will add our Disposables. This bag will handle their lifecycle. On DisposeBag deinit, every Disposable get disposed to ensure that resources are properly released when not needed anymore. In our case, the DisposeBag deinit will occur on ViewModel deinit.
class TableViewViewModel {

	// MARK: Private properties
	private let privateDataSource: Variable<[String]> = Variable([])
	private let disposeBag = DisposeBag()

	// MARK: Outputs
	public let dataSource: Observable<[String]>
}
Last requirement is to implement the ViewModel’s init method which takes one parameter of type Driver<Void> and represents the addButton tapped event sequence. On every tap, we’ll need to append a String item to the privateDataSource Variable through its .value property. The .value property here is an Array of String.
The Driver type is a perfect fit for UI interactions since it never fails and it delivers events on the MainThread.
The job is done for the privateDataSource, we just need to expose the public dataSource as an Observable of the privateDatasource.
init(addItemTap: Driver<Void>) {

		// Make the output dataSource an Observable of the privateDataSource
		self.dataSource = privateDataSource.asObservable()

		//Register addButton tap to append a new "Item" to the dataSource on each tap -> onNext
		addItemTap.drive(onNext: { [unowned self] _ in
			self.privateDataSource.value.append("Item")
		})
		.addDisposableTo(disposeBag)
	}
⚠️ Note: [unowned self] is used to bring self to the closure unretained to prevent retain cycle also known as memory leak.
We now have a View and a ViewModel ready to use, let’s bind them!
View and ViewModel binding
In order to make the View and the ViewModel working together, we’ll need to bind them.
Declare a viewModel property of TableViewViewModel type inside the TableViewController class
In the viewDidLoad method we’ll instantiate the viewModel property to set the addButton rx.tap property as Driver to the TableViewViewModel constructor. The addButton is now bound to the viewModel.
	private var viewModel: TableViewViewModel!

	override func viewDidLoad() {
		super.viewDidLoad()
		setupViewModel()
		setupTableView()
		setupAddButton()
	}

	private func setupViewModel() {
		self.viewModel = TableViewViewModel(addItemTap: addButton.rx.tap.asDriver())
	}
The very last step is to bind the viewModel’s dataSource of String items to our UITableView, this binding will be stored in a DisposeBag.
	private let disposeBag = DisposeBag()

	private func setupTableViewBinding() {

		viewModel.dataSource
			.bind(to: tableView.rx.items(cellIdentifier: cellIdentifier,
				  						cellType: UITableViewCell.self)) {  row, element, cell in
				cell.textLabel?.text = "\(element) \(row)"
			}
			.addDisposableTo(disposeBag)
	}
Finally we need to tell the UITableView that every dataSource item must be represented by a UITableViewCell dequeued from the previously defined cellIdentifier on which we are setting a text value equals to the item value concatenated with the current row number.
You can now tap on the addButton in the UINavigationBar and see items being added to the UITableView.
Here is the complete Playground content:
import RxSwift
import RxCocoa
import UIKit
import PlaygroundSupport
PlaygroundPage.current.needsIndefiniteExecution = true

class TableViewViewModel {

	// MARK: Private properties
	private let privateDataSource: Variable<[String]> = Variable([])
	private let disposeBag = DisposeBag()

	// MARK: Outputs
	public let dataSource: Observable<[String]>

	init(addItemTap: Driver<Void>) {

		// Make the output dataSource an Observable of the privateDataSource
		self.dataSource = privateDataSource.asObservable()

		//Register addButton tap to append a new "Item" to the dataSource on each tap -> onNext
		addItemTap.drive(onNext: { [unowned self] _ in
			self.privateDataSource.value.append("Item")
		})
		.addDisposableTo(disposeBag)
	}
}

class TableViewController: UITableViewController {

	private let addButton = UIBarButtonItem(barButtonSystemItem: .add, target: self, action: nil)
	private var viewModel: TableViewViewModel!
	private let cellIdentifier = "Cell"
	private let disposeBag = DisposeBag()

	override func viewDidLoad() {
		super.viewDidLoad()
		setupViewModel()
		setupTableView()
		setupAddButton()
		setupTableViewBinding()
	}

	private func setupViewModel() {
		self.viewModel = TableViewViewModel(addItemTap: addButton.rx.tap.asDriver())
	}

	private func setupAddButton() {
		navigationItem.setRightBarButton(addButton, animated: true)
	}

	private func setupTableView() {

		//This is necessary since the UITableViewController automatically set his tableview delegate and dataSource to self
		tableView.delegate = nil
		tableView.dataSource = nil

		tableView.tableFooterView = UIView() //Prevent empty rows
		tableView.register(UITableViewCell.self, forCellReuseIdentifier: cellIdentifier)
	}

	private func setupTableViewBinding() {

		viewModel.dataSource
			.bind(to: tableView.rx.items(cellIdentifier: cellIdentifier, cellType: UITableViewCell.self)) {  row, element, cell in
				cell.textLabel?.text = "\(element) \(row)"
			}
			.addDisposableTo(disposeBag)
	}
}


let rootViewController = TableViewController()
rootViewController.title = "RxSwift TableView Binding"

let navigationController = UINavigationController(rootViewController: rootViewController)
navigationController.view.frame = CGRect(x: 0, y: 0, width: 320, height: 568)
PlaygroundPage.current.liveView = navigationController.view
And the expected result:
Conclusion
We’ve quickly seen how ViewModels and Views are acting together in a MVVM architecture powered by RxSwift through event/data stream in a declarative way. This is achieved without implementing any of the UITableViewDelegate and UITableViewDataSource dedicated methods.